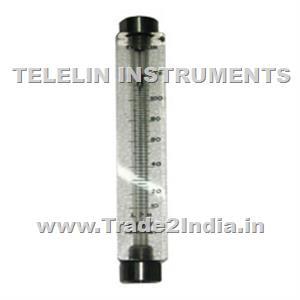
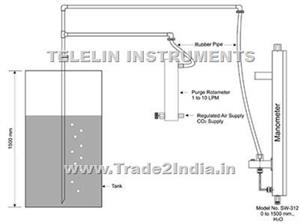
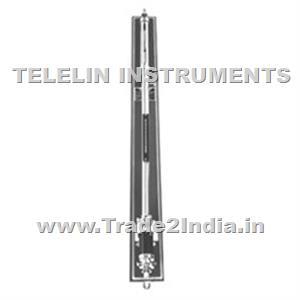
Featured Products

Highest quality standards are achieved through the implementations of latest technology, decades of experience and everlasting moral values , which have helped us to retain our customers as well as multiply them.

Welcome to TELELIN INSTRUMENTS INDIA

Absolute Vaccum Manometer

  /> </div>
<div class=

“Telelin” make Mercury filled absolute High vacuum manometers are used for accurate measurement of process vacuum in its last stages. They have been found useful and reliable in place of vacuum gauge particularly in process where accurate vacuum measurement in essential. 

Model Available : 

HVM-450 + SP-45 
( wall / front of panel mounting type ) 

HVN -455 + SP-45 
( Stand mounted / self standing ) 

Standard Ranges : 

a) 50-0-50 mmHg 
b) 100-0-100 mmHg 
c) Any other special range can be manufactured.

Gang Manometer

  /> </div>
<div class=

Gang Manometer means more then one manometer accommodated in common casing to facilitate different processes pressure indication at one place . It can be U-tube type or Single Limb well type . Upto 10 Manometers can be accommodated in one Gang Manometer. Ranges as desired by user in required units can be manufactured. 

Accuracy : 

+/- 2% of Full Scale Range or Better on Request. 

Model Available : 

UT-800 / UT-835 
( stand mounted type )

SW-800 /SW-835
( stand mounted type)

Inclined Tube Manometer

  /> </div>
<div class=

“Telelin” make acrylic plastic Inclined Tube Manometer are precision instruments in inclined and vertical (Well Type styles for the measurement of static pressure, vacuum or differential pressure, recommended where less then 1mm readings are required . Minimum divisions available are 0.5mm , 0.2mm , 0.1mm or as required . Four different models are available. Utilize expanded scales for unusual sensitivity for fast, easy reading of low pressures, draft or small differential pressure. 

Model Available : 

INC-535 (Right Angle Shape Acrylic Manometer) 

INC-525 (Degree Shape Manometer) 

INC-525 + Box Mounted for Portable use 

INC-575 (High Range, Long Scale Industrial grade manometer)

Single Limb Well Type Manometer

  /> </div>
<div class=

“Telelin” make Single Limb well Type direct reading Manometers are used for precision measurement of pressure, vacuum, differentials pressure flow and liquid level measurement. Initially liquid is filled in the well till the scale shows zero but when a positive pressure is being applied on the liquid in the well, causing the level to go down very slightly. Liquid level in the indicating tube has risen substantially giving direct reading from scale in desired units. The single limb well type manometer are accurate & dependable as well as highly versatile for many applications. All Scales are graduated to correct for the drop in the well level. 

Model Available : 

SW-312 WG (Water Column) 

SW-312 HG (Mercury Column) 

SW-335 (Standard Mounted) 

PBM-SW 
(Acrylic Body Single Limb Well Type)

U Tube Manometer

  /> </div>
<div class=

“Telelin” make U-Tube Manometer are accurate, Simple and economical instruments for measurement of positive pressure, negative pressure, differential pressure, vacuum, flow etc. U-tube manometers indicates pressure as vertical distance from the top of the fluid in one leg to the top of fluid in the other leg. Scales are graduated from centre zero towards each end and distance s traveled by liquid from zero are added. There in no loss of accuracy if the two distances are different because of slight tube bore difference. The units of measure commonly used are mmW.g., inch W.g., mm Hg, Inch Hg, kg/cm 2 , PSIG, mbar, Pa , Flow Units etc. 

Model Available : 

UT-212 wall or front of panel mounting type

UT-235 Stand mounted i.e Self standing type 

UT -250 ( Wooden borad mounted U-tube manometer ) 

UT- PU ( U-tube manometer using polyurethane tube in place of glass tube )

PBM-UT ( One piece acrylic plastic body U-tube Manometer ) 

HUT- 291 ( U-tube manometer with attached 3 valve manifold or 5 valve manifold unit )

Digital Pressure Manometer

  /> </div>
<div class=

Microprocessor Based Digital Pressure Manometer, with excellent Accuracy & Repeatability in measurement of Pressure Using highly stable Temperature Compensated Pressure sensors with Microprocessor Technology and Software. This Precision Pressure Manometer provides many operational features such as any Selectable Pressure Unit, Auto Zero function, Peak Hold Mode etc. All Manometer are provided with calibration reports traceable to IDEMI.

FEATURES :

• Selectable Engg. Unit From 11 common Pressure Unit mm/inches of WC/Hg, Kg/cm2, Psi, mbar, Bar, Kpa.
• Automatic Zero Adjustment & Self Test 
• Selected Unit Remains in Memory 
• Peak Hold Mode with a Key 
• Highly Accurate ± 0.1 % of FS.
• Overload Indication (i.e. Range Exceedancy) 
• 32 Character Alphanumeric LCD (with Backlight Option). 
• Digital Averaging. 
• Re-calibration & Linearization by Keys. 
• High Resolution with 4½ Digits 
• Hand Held or Table Top Model 
• Display

SPECIFICATIONS :

Display : 16 Character X 2 Line LCD Module (Back Lit Option Through Adaptor) 
Keys : 3 Nos. (Units, Auto zero & Peak Hold) 
Resolution : 4 ½ Digit ( i. e. 19999 Counts) 
Pressure : Selectable from any of 111 pressure 
Unit : Units with Units Key 
Overload Indication : At 20 % of full Scale, Audio-Visual Indication 
Sensor Range : Any Sensor from 0.3 PSI to 5000 PSI 
Power : 6V (1.5 Vx4 Pencil Cells) or through Mains Adaptor (Optional) 
Dimension : 220 x 150 x 60 mm for Table Top Model 220 x 100 x 40 mm for Hand Held Model. 
Accuracy : Better than ± 0.1 % of ES

Acrylic Plastic Body Rotameters

  /> </div>
<div class=

“Telelin” make high accuracy, clear acrylic plastic body rotameter uses tapered tube drilled directly in acrylic plastic body itself, acrylic plastic is highly stabled, chemical resistant and gives glass like clearness which enables clear visualization of flow. In Acrylic Body rotameter, Flow range is calibrated, engraved and coloured with black on body itself for long lasting durability. Acrylic body rotameters are generally used for Air, Water and Gases. 

Temperature Rating : 50 oC Max 

Pressure Rating : 10 Kg/cm2 Max 

Accuracy : +/- 2% Full Scale Range 

Models Available : 

PB-797 FL, .……………FL=Flanged End Connections at bottom and top 

PB -797 FLS, ………….FLS=Flanged Connection at Side or at Rear 

PB -796 SC, …………...SC=Screwed End Connection at bottom and top 

PB -796 SCS, ………….SCS=Screwed End Connection at Side or at Rear

By Pass Type Rotameter Complete Assemblies

  /> </div>
<div class=

Telelin makes By-Pass Type Rotameter Complete Assemblies are recommended for large flows in 2” & above size pipe lines, where direct on-line Rotameter is not possible for becoming very costly due to non availability of required dia. Tube or large dia. Tube respectively. Assembly consists of 

a) A pair of 38mm thick orifice flanges with ½” BSP female pressure tapings 
b) A precisely bored & finished orifice plate 
c) Necessary by-pass piping 
d) 2 Nos. Isolating valves 
e) A rotameter in By- Pass line with range orifice plate. All items assembled together as shown in Pic. 1 & 2 above MOC as required by fluid / client. By pass piping design (position) differs for vertical installation & horizontal Installation. 

Details required for submitting offer :   

a) Piping position / Flow direction i.e. vertical: Upward / Downward. Horizontal : Left to right or right to left 
b) Line size, exact I.D. & O.D. or Pipe schedule 
c) Fluid Name, OP. Temp, OP. Pressure, OP. SP. GR. / Density, OP. Viscosity 
d) Minimum & Maximum Flow, Special details if any.

Digital Magnetic Rotameter

  /> </div>
<div class=

Telelin make High accuracy digital metal tube rotameters are used in place of glass tube rotameters wherein there is high pressure and high temperature in the line which glass tube rotameter cannot withstand. This magnetic flow meter uses magnetic float which is detected by highly sensitive magnetic field detection sensor which enables to show digital readout. This flow meter does not require any electrical connection, as it operates on replaceable battery. This flow meter has in built two wire transmitter i.e 4-20 mA output. 

Ranges Available : From 0.2 to 150 m 3 /Hr (Water Flow) From 6 to 4500 Nm 3 /Hr (Air Flow) 

Accuracy : +/- 2% of Full Scale Range. Range Ability : 10 : 1 

Temperature Rating : -50 to 120 o C 

Pressure Rating : 70 Kg/cm 2 

Enclosure : Flameproof/Weatherproof 

Line Size : from 15 NB to 150 NB 

Power Supply : 9 VDC Battery 

Optional : Flow totalizer inbuilt or external can be provided on request.

Gang Rotameter

  /> </div>
<div class=

“Telelin” make high accuracy Gang Rotameters i.e A Gang of 4 to 5 Rotameters or more as required are used for batching purpose and used by valve manufacturers for testing of leak in various line sizes of valves manufactured by them. This rotameter can be easily carried on for the field purpose can be provided with common or individual inlet and outlet as desired with flow control valve at entry point individually or common. This rotameter can be provided in acrylic body or glass tube (In a Gang) mounted in a single casing. 

Models Available : 

GT-800
(Gang of Glass Tube Rotameter) 

PB-800 
(Gang of Plastic Body Rotameter) 

GT-PB-800 
(Gang of Plastic Body and Glass Tube Rotameter)

Glass Tube Rotameters

  /> </div>
<div class=

“Telelin” make high accuracy fully enclosed online direct reading glass tube rotameters are relatively simple and reliable instruments for continuous flow rate indication. This rotameters consists of a vertical mounted, calibrated tapered tube with float inside and a scale directly calibrated as per flow range taking into account operating Sp. Gr. /Density and operating viscosity. Your line fluid raises the float in tapered glass Tube, Area increases as float moves upward thereby showing the exact (Increasing) flow. 

Accuracy : +/- 2% Full Scale Range 

Mounting : Vertical with Bottom inlet i.e Mounting In Upward Vertical Flow line 

MOC : M-S / 304 S.S / 316 S.S / P.P / PVC / PTFE or as required 

Models Available : 

GT-797 FL,
FL=Flanged End Connections at bottom and top 

GT-797 FLS, 
FLS=Flanged Connection at Side or at Rear 

GT-797 SC, 
SC=Screwed End Connection at bottom and top 

GT-797 SCS, 
SCS=Screwed End Connection at Side or at Rear

Low Flow Acrylic Plastic Body Rotameters

  /> </div>
<div class=

“Telelin” make high accuracy, clear acrylic plastic body Low Flow rotameter uses tapered tube drilled directly in acrylic plastic body itself, acrylic plastic is highly stabled and chemical resistant and gives glass like clearness which enables clear visualization of flow. In Acrylic Body rotameter, Flow range is calibrated, engraved and coloured with black on body itself for long lasting durability. Acrylic body Low Flow rotameters are generally used for Purging and used for chlorination of Gases. 

Temperature Rating : 50 oC Max 

Pressure Rating : 5 Kg/cm 2 Max 

Accuracy : +/- 2% Full Scale Range 

Mounting : Wall Mounting, Front of Panel Mounting with help of screwed mounting lugs, Direct Mounting. 

Models Available : 

PB-715 
(With Flow Control Valve at entry point and connections at rear) 

PB -725 
(Having 304 S.S /316 S.S Material top & Bottom Blog and Flow Control Valve at entry Point in bottom block) 

PB -755 
(Top & Bottom Connections of M/F Screwed, Without Flow Control Valve)

Low Flow Glass Tube Rotameters

  /> </div>
<div class=

“Telelin” make high accuracy fully enclosed Low Flow glass tube rotameters/purge rotameters are relatively simple and reliable instruments for continuous flow rate indication. This rotameter consists of a vertical mounted, calibrated tapered tube with float inside and a scale directly calibrated as per flow range taking into account operating Sp. Gr. /Density and operating viscosity. Your line fluid raises the float in tapered glass tube, Area increases as float moves upward thereby showing the exact ( Increasing) flow. This flow meters are provided with/without flow control valve at entry point. 

Accuracy : +/- 2% Full Scale Range 

Casing : Aluminum Casing from 3 sides and clear acrylic front 

Mounting : Wall Mounting, Front of Panel Mounting with help of screwed mounting lugs, Direct Mounting. 

MOC : M-S / 304 S.S / 316 S.S / P.P / PVC / PTFE or as required 

Models Available : 

GT-777 R/TB 
( Having Flow Control Valve at entry point and connections at rear or Top and Bottom ) 

GT-771 R/TB 
( Without Flow Control Valve and having connections at rear or Top and Bottom ) 

GT-785

Ultrasonic Flowmeters

  /> </div>
<div class=
Ultrasonic wall-mounting Clamp-on Flow meter provides abundant capabilities for accurate liquid flow measurement from outside of a pipe.
It utilizes best technology in ultrasonic transmission/receiving, digital signal processing and transit-time measurement. The signal quality tracking and self-adapting technologies allow the system to optimally adapt to different pipe materials automatically.

The Flowmeter is carefully designed with their user-interfaces, self-explaning and their operation simple and easy to use . The unique clamp-on fixture design makes the installation very simple , with no skill required by user . 

Due to the non-invasive nature of clamp-on transducers, there is no pressure drop, no moving parts, no leaks, no risk of contamination or corrosion.

Salient Features

  • Ideal for both clean and opaque liquid flow measurement
  • High accuracy 1.0% reading
  • Bi-directional measurement. Totalizer display for net, positive and negative flow
  • Easy and economical installation, No pipe cutting
  • Wide measurement range 0 ~ 12m/s
  • Wide pipe size range (DN 12 ~ 4570mm)
  • Cost effective and Versatile
  • Suitable for all commonly used pipe materials
  • Non invasive, No moving parts, No pressure drop, No maintenance

Applications

  • Water and waste water management
  • Chemical, Petrochemical and Process Industries                                 
  • Fertilizer Industries
  • Mining Industries
  • Pharmaceutical Industries      
  • Sugar, Beverage Industries                  
  • Paper and Pulp Industries
  • Dredging Industries
  • Food and Drug Industries

Air Purge Rotameters

  /> </div>
<div class=

“Telelin” Air Purge Rotameters Consisting of :

•  Tee Shape drop pipe, Material 304 S.S 

•  3 LPM, Air Plastic Body Rotameter with Flow Control Valve for purging 

•  Single limb well type manometer, Wall mounting type generally as per our model No. SW-312 Hg. With 304 S.S Material wetted parts. 

•  Connection Hose pipes to complete connection of all 3 above. 

DETAILS REQUIRED FOR SUBMITTING OFFER. 

1) Tank Height 
2) Liquid Details 
3) Purging Gas Detail 
4) Quantity 
5) Special Details if any

Electromagnetic Flowmeters

  /> </div>
<div class=
Ultrasonic wall-mounting Clamp-on Flow meter provides abundant capabilities for accurate liquid flow measurement from outside of a pipe.
It utilizes best technology in ultrasonic transmission/receiving, digital signal processing and transit-time measurement. The signal quality tracking and self-adapting technologies allow the system to optimally adapt to different pipe materials automatically.

The Flowmeter is carefully designed with their user-interfaces, self-explaning and their operation simple and easy to use . The unique clamp-on fixture design makes the installation very simple , with no skill required by user . 

Due to the non-invasive nature of clamp-on transducers, there is no pressure drop, no moving parts, no leaks, no risk of contamination or corrosion.

Salient Features

  • Ideal for both clean and opaque liquid flow measurement
  • High accuracy 1.0% reading
  • Bi-directional measurement. Totalizer display for net, positive and negative flow
  • Easy and economical installation, No pipe cutting
  • Wide measurement range 0 ~ 12m/s
  • Wide pipe size range (DN 12 ~ 4570mm)
  • Cost effective and Versatile
  • Suitable for all commonly used pipe materials
  • Non invasive, No moving parts, No pressure drop, No maintenance

Applications

  • Water and waste water management
  • Chemical, Petrochemical and Process Industries                                 
  • Fertilizer Industries
  • Mining Industries
  • Pharmaceutical Industries      
  • Sugar, Beverage Industries                  
  • Paper and Pulp Industries
  • Dredging Industries
  • Food and Drug Industries

Principles Of Rotameter And Flowmeter

  /> </div>
<div class=

When fluid or gas flows through a taper tube containing a float, a pressure difference of P1 and P2 is created between upper and lower side of the float. The float moves upwards by a force obtained by multiplying the pressure differential by the maximum cross sectional area of the float. 

Due to taper tube, as the float moves upwards, the fluid passing area increases as a result of which the differential pressure decreases. Upward movement of float stops when the dead load is dynamically balanced by the differential pressure. Tapering of metering tube is so designed that the vertical movement of the float becomes linearly proportional to the rate of flow and the scale is provided to read the position of the float, thus giving birth to flow rate indication. 

Based on Bemoulli's theorem, the principle mentioned above can be theoretically expressed as follows. 

FLOW FORMULA 

 
Where 

•  Q = Volumetric flow rate 
•  V = Volume of Float 
•  C = Flow coefficient 
•  Af = Maximum pressure receiving area of float. 
•  A = Fluid passing Area 
•  P = Float Density 
•  g = gravimetric acceleration 
•  y = Fluid Density 

There are various types of flow meters available namely : 

•  GLASS TUBE ROTAMETERS 
•  BY-PASS ROTAMETER COMPLETE ASSEMBLIES 
•  PLASTIC BODY ROTAMETERS GANG / MULTIPLE ROTAMETERS 
•  METAL TUBE ROTAMETERS WITH DIGITAL FLOW RATE INDICATION 
•  ROTEMERS AS PER SAMPLE & OR DRAWING 
•  METAL TUBE ROTAMETER WITH TRANSMITTER 
•  i.e. 4-20 mA output & DIGITAL TOTALISER 
•  ( OPERATING ON 4-20mA OUTPUT)

Tubular Level Indicator

  /> </div>
<div class=

“Telelin” make Tubular Level Indicators are most simple and reliable device for level visualization. These Level Indicators find wide application for level observation in process tanks and batching tanks. If desired, Scale in volumetric unit is possible. 

Temperature Rating : 100oC 

Pressure Rating : upto 12 Kg/cm2 

Model No. : TL – 122 / TL -123
(With Drain & Isolating valve) 

Application Liquids : Water, Phenol, other non corrosive liquids.

Float And Board Level Indicators

  /> </div>
<div class=

“Telelin” make float & board level indicators are based on simple mechanical principle and are widely used in large tanks and in overhead storage tanks where the tanks are not pressurized. It usually consists of float, pully housing pointer cradle with nylon roller & 150mm wide aluminium epoxy powder coated ,Fluorescent plastic taped scale .Lining at every 1cms and numbering at every 10 cms . 

CC Distance : upto 15 meters 

Model No : TL – 121 

Application : Oil Tanks, Water & Acids

Glass Tube Level Indicator (Moving Bolt Type)

  /> </div>
<div class=

•  Small size level indicator for normally small oil tanks level indication. 
•  Connections posible 1/4" BSP (M) to 1" BSP (M). Bottom side only. 
•  Top side cap with vent hole. •  Pipe length 1" to 24". 
•  Material of construction M.S., Brass, 304 S.S., 316 S.S., or other as required. 
•  Glass tube : Borosilicate, having 12mm or 16mm or 19mm O.D. as per connection size 
•  Glass tube protective casing : normally M.S., Ch. plated having slitted front & back for viewing 
•  Temperature rating upto 150ºC. Pressure upto 15 PSIG

Acrylic Body Level Indicator (Moving Bolt Type)

  /> </div>
<div class=

•  Small size level indicator for normally small oil tanks level indication. 
•  Connections possible M10, M12, Male threadings at both side 
•  Standard connection C.C. : 3" / 4" / 5" 
•  Material of construction main chamber acrylic plastic, Bolt M.S. Powder coted 
•  Acrylic chamber protective casing : M.S., powder coated, •  Temperature rating upto 50ºC. Pressure rating upto 7 PSIG

Level Switches

  /> </div>
<div class=

PRINCIPLE OF OPERATION : 

Telelin Level Switch works on Magnetic Principle. The float carries a permanent magnet which is opposed by a similar magnet inside the switch. As the float moves up, The inside magnet which carries contacts repels and moves away from the float magnet. This ensures a snap action and change over of contacts. This Action is completely gland less and hence no leakage possibility into the switch housing. These switch can be successfully used in water tanks, steriliser, tea boilers, high pressure boilers, chemical tanks, water heaters, storage tanks and innumerable other applications. 

SPECIFICATIONS : 

Type : Magnetic internal float operated. 

Switch Housing : Weather Proof, C.S / S.S.304 / S.S.316. 

Contact Rating : 2A at 240V AC. 0.5A at 220V D.C. 

Conduit Connection Size & Type : 3/4” I.T. or equivalent adapters for other sizes or suitable cable glands. 

Max. Operating Pressure : KG/CM2. 

Specif1ic Gravity : 0.8 and above special floats for low S.G. 

Float, Stem & Wetted parts material : S.S.304/S.S.316. 

Type of Contacts : Air break 1 No + 1NC. 

Switch Differential : Fixed 12 mm. (Approx). 

Max Temperature : 250C. 

Connection Size & Type : 2” or 21/2” NPT.

Magnetic Bi Colour Level Indicators

  /> </div>
<div class=

“Telelin” make Bi-Colour type level indicators are designed, using simple magnetic principle. Level is indicated by changed colour of Bi-colour magnetic rollers. They are mounted on aluminium channel, protected by sturdy aluminium box which is moved by magnetic float in the main line pipe chamber. The roller turns upside down changing colour from yellow to red. Thus Showing level . It is used at places where there is flammable toxic or high temperature and high pressure fluid where glass type level indicators cannot be used . 

CC Distance : 3000mm max. 

Pressure Rating : 25 kg/cm 2 max. 

Temperature Rating : 350 o C 

Connection Orientation : Side Mouted 

Model No. : TL-124 

Application : liquified gases, CL 2 , NH 3 , Propylene, PCL 3 , Oleum, H 2 S0 4 , HCL, Pesticides, Molten Sulphur, Lead, Solvent Acids, Chlorosulphonic Acid.

Magnetic Level Indicator

  /> </div>
<div class=

“Telelin” Magnetic Level indicators are designed using simple magnetic principle. Level is indicated by a weighted magnetic capsule which is properly capsuled in glass tube which is moved by magnetic float in the main pipe chamber. It is used at places where there is flammable toxic or high temperature and high pressure Liquids. 

CC Distance : 300mm to 6000mm 

Pressure Rating : 25 Kg/cm 2 

Temperature Rating : 150 oC 

Connection Orientation : Side Mouted, Top Mounted 

Model No : TL-125 

Application : Liquid Propane, Liquid Butane, Acids, Steam, Oil

Reflex Level Indicator

  /> </div>
<div class=

“Telelin” Reflex Level Indicators are used for visual level indication of tanks . Normally preferred over tubular LI, where tank pressure & or temperature are more . On Reflex glass, colourless liquids appears black thereby making Level observation easy. 

CC Distance : 3000mm / 3 meters Max. 

Pressure Rating : upto 40 Kg/cm 2 

Temperature Rating : upto 350 o C 

Model No. : TL - 130 

Application : Pressurized Tanks , High Temperature liquid tanks , Corrosive liquids, Oil, Caustic , Acids.

Top Mounted Magnetic Level Indicators Bi Colour Roller Type

  /> </div>
<div class=

“Telelin” make Top Mounted Magnetic Level Indicator are used for visual indication in underground tanks or tanks below ground level. It is used for liquids with high pressure, high temperature, highly corrosive liquids. 

Model No. : TL-125 

CC Distance : upto 3000mm i.e. 3 meters 

Temperature Rating : 150 o C 

Pressure Rating : upto 20 Kg/cm 2 

Application Liquids : Chemical Solution, Acids, Pressurized Tanks

Transparent Level Indicator

  /> </div>
<div class=

“Telelin” Transparent Level Indicators are used for visual level indication at tanks & places where there is high pressure & high temperature. It is used for liquids which are dark like oils and so it is widely used in petrochemical, fertilizer, chemical plants and it allows visual indication from two sides. 

CC Distance : 1900mm for Straight Through / 1800mm for Hook Up in single length Extended Ranges through a coupler 

Pressure Rating : upto 40 Kg/cm2 

Temperature Rating : upto 350oC 

Application : Corrosive liquids, Oil, Caustic Acids, HF Acids

Air Purge Level Indicators

  /> </div>
<div class=

“Telelin” Air Purge Level Indicators Consisting of :

•  Tee Shape drop pipe, Material 304 S.S 

•  3 LPM, Air Plastic Body Rotameter with Flow Control Valve for purging 

•  Single limb well type manometer, Wall mounting type generally as per our model No. SW-312 Hg. With 304 S.S Material wetted parts. 

•  Connection Hose pipes to complete connection of all 3 above. 

DETAILS REQUIRED FOR SUBMITTING OFFER. 

1) Tank Height 
2) Liquid Details 
3) Purging Gas Detail 
4) Quantity 
5) Special Details if any

Double Window Sight Flow Indicators

  /> </div>
<div class=

“Telelin” make double window side flow indicators are used for visual indication of flow in vertical as well as horizontal pipelines. It enables maintaining flow of the liquid by viewing instantaneous flow and guides for any subsequent change in flow desired. Various different models are available as per required application and in different material of construction, M.S, 304 S.S, 316 S.S. 

MODEL : 200S-FLT - (FLAPPER TYPE) 

200S-FLT sight flow indicators are recommended for both horizontal and vertical pipe lines with upward flow although frequently used for gases. Flapper type is best suitable to transparent or slightly opaque liquids. Position of flapper indicates variation in flow rates may be supplied without flapper where no internal indicator is required. 

MODEL : 200S-DRT - (DRIP TYPE) 

200S-FDT sight flow indicators are best adapted to vertical downward flow designed without any obstruction this type is particularly useful in distillation and similar apparatus where flow is apt to be intermittent. 

MODEL : 200S-ROT - (ROTARY TYPE) 

200S-ROT sight flow indicators operates successfully in any position but are particularly adapted to pipelines carrying dark solutions where the motion of the rotor is easily detected. they are equally adapted to transparent solutions and gases and are frequently installed where observation is to be made from distance. Available with rotor of PVC, PP, PTFE or metal. 

MODEL : 200S-PT - (PLAIN TYPE) 

200S-PT sight flow indicators are plain without any internal indicator and services as observing window and are suitable for vertical as well as horizontal lines and are adapted to liquids and gases. 

MODEL : 200S-FLT - (FLANGE TYPE) 

200S-FLT sight flow indicators are plain without any internal indicator and services as observing window and are suitable for vertical as well as horizontal lines and are adapted to liquids and gases. Flange ends enables easy mounting in the line with proper lick proof gaskets. Spare matting flanges and nut-bolts (hardware) can be provided at extra cost.


Full View Sight Flow Indicators

  /> </div>
<div class=

“Telelin” make Full View Sight Flow Indicators are suitable for visual indication of flow where maximum flow visibility is desired. It becomes part of your pipeline and full flow becomes visible. It can be mounted in vertical as well as horizontal line. Telelin Full View sight glass is made of borosilicate pipe section glass which is highly heat resistant and has low thermal expansion with excellent chemical durability. 

Special Features : Easy Installation, Easy Maintenance, Easy Glass Tube replacement. 

Standard length : 175mm using 150mm long both side flared and glass tube. 

MOC of wetted parts : MS, 304 SS, 316 SS, PVC, PP. 

Orifice Assemblies

  /> </div>
<div class=

Orifice Plate with holding flanges nut bolts and gaskets are called orifice assembly. Flanges generally are of M.S. / C.S./304 S.S./ 316 S.S., nut bolts M.S. Galvanized, Gasket C.A.F. Other construction is possible & will be made against order. Flanges generally are of 4 types a) Weld Neck b) Slip-on c) Carrier Ring d) D & D/2 tappings or pipe run assembly. Pressure tappings are in flange itself in 1 st 3 types, while for D & D/2 they are on pipe. Assemblies supplied for 1½ “ to 24” Line sizes. Orifice bore calculations as per BS1042 on the basis of your given data is done & bore size is determined & made. Bore calculations are also provided alongwith instruments or can be sent for approval before manufacturing.

Orifice Plates

  /> </div>
<div class=

They are primary element to generate differential pressure for rate of flow measurement. Designed & made as per BS 1042, or as per your given drawing or dimensions. 

Bore is precisely bored to exact tolerances & have sharp lead edge to ensure accuracy. 

Line size i.e. exact I.D. & O.D. or pipe schedule, fluid data i.e. Name, Op. Temp., Op. Pressure, Maximum Flow details & Maximum D.P. at full flow details are required for making or quoting. Standard construction is 304 S.S. or 316 S.S. Any other construction is possible. 

Standard thickness are 3 mm, 4.5mm, 6mm & 8mm . 

For easy reference, Fluid, Flow, Bore & Line Size details are engraved on orifice plate handle.

Comparison Test Pump

  /> </div>
<div class=

Comparison Test Pumps are used For Calibrating pressure gauges against master pressure gauge. The master gauge to be periodically checked on dead weight pressure gauge tester. Two gauge connectors are provided for connecting master gauge and gauge to be tested to the same hydraulic pressure. Screw Pump, Oil operated, will generate pressure in the circuit. Permits easy and accurate setting of pressure.
 

Model Nos. Range
TP1 0 -100 kgf/cm2 
0 -1500 lgf/in2 With a large capacity screw pump and a removable oil reservoir with isolating valve in a simple line circuit permitting effective air removal.
TP2 0 -700 kgf/cm2
0 -10000 lgf/in2 With lever operated Priming Pump also giving continuous oil delivery for filling up large gauges or even external piping. Capable of developing 10% of the instrument range and with isolating valves at both ends. Unique closed circuit for effective air removal.
TP3 0 -1000 kgf/cm2
0 -15000 lgf/in2

Water operated models are also available in comparison test pumps. All wetted parts will be made of stainless steel.


Dead Weight Pressure Gauge Tester

  /> </div>
<div class=

Dead Weight Pressure Gauge Tester provided with a gauge connector of 1/2" BSP and complete with one set of weights (MS Phosphated Black or SS 304) in a storage box, 1 dust cover, 1 instruction manual, 1 tin of oil (1/2 litre) and a tool box containing 1 pointer puller, 1 pointer punch, adapters of M20 x 1.5, 1/4" & 3/8" BSP, 4 Spanners, 1 Allan key, 1 screw driver and 1 set of spare seals. Accuracy ± 0.1% of F.S. 

Important Explanation : 

"BASIC PRICE" includes one set of weights (MS Phosphated Black) in any one unit of calibration i.e., kgf/cm 2 , bar, lbf/in 2 , mmHg or in Hg. If 2 units of calibration are required with one tester, order 1 extra set of weights that time itself. Similarly for 3 units of calibration, order 2 extra sets of weights. If unit of calibration is not specified, Instruments will be supplied in kgf/cm 2 unit for pressure testers and mm. Hg. for vacuum tester. Master gauges, High Accuracy Pressure Gauges will be supplied at extra cost. 

REGULAR MODELS AND INC (SPECIAL) MODELS NO. AND RANGE DETAILS 

Mode
 
RANGE (kgf/cm 2 )
 
Minimum Pressure
Smallest Step
Maximum Pressure
DW 10
 
0.1
0.01
2.5
DW 10-INC
 
0.1
0.001
2.5
DW 11
 
0.1
0.05
6
DW 11-INC
 
0.1
0.001
6
DW 12
 
0.2
0.05
16
DW 12-INC
 
0.2
0.002
16
DW 13
 
0.4
0.1
25
DW 13-INC
 
0.4
0.005
25
DW 14
 
0.4
0.1
40
DW 14-INC
 
0.4
0.005
40
DW 15 
 
1
0.1
60
DW 15-INC
 
1
0.01
60
DW 16
 
1
0.1
100
DW 16-INC
 
1
0.02
100
DW 21
 
2.0
0.5
160
DW 21-INC
 
2
0.02
160
DW 22
 
4.0
1.00
250
DW 22-INC
 
4
0.05
400
DW 23
 
5.0
1.00
400
DW 23-INC
 
5
0.05
400
DW 24
 
10.0
2.00
600
DW 24-INC
 
10
0.1
600
DW 25
 
10.0
2.00
700
DW 25-INC
 
10
0.1
700
DE 26
 
10
2
1000
DW 26-INC
 
10
0.1
1000
DW 30
LP
0.2
0.10
16
 
HP
10
1
160
DW 30-INC
 
0.2
0.002
16
 
 
10
0.02
160
DW 31
LP
0.4
0.10
25
 
HP 
24
1
250
DW 31-INC
 
0.4
0.005
25
 
 
24
0.05
250
DW 32
LP
0.4
0.10
40
 
HP 
34
1
400
DW 32-INC
 
0.4
0.005
40
 
 
34
0.05
400
DW 33 
LP
1.0
0.20
55
 
HP 
50
2
600
DW 33-INC
 
1
0.01
55
 
 
50
0.1
600
DW-34
LP
1.0
0.20
65
 
HP
50
2
700
DW 34-INC
 
1
0.01
65
 
 
50
0.1
700
DW 35
LP
1.0
0.2
100
 
HP 
50
2
1000
DW 35-INC
 
1
0.01
100
 
 
50
0.1
1000

Master Pressure Gauges

  /> </div>
<div class=

Master Dial Pressure Gauge direct mounting type with 1/2” BSP bottom connection, Bourdon, Movement & Shank of stainless steel having aluminium body, acrylic window, mirror-reflex dial, micro-adjustment pointer with Test Certificate traceable to National Physical Laboratory, New Delhi. 

Accuracy : +/- 0.25% of f.s. 

Unit of Calibration: kg/cm2 or bar 

Dial Size
Range
Least
Count
 
  Dial Size
Range
Least
Count
150 mm
0 – 1
0.005
250 mm
0 – 1
0.005
150 mm
0 – 1.6
0.01
250 mm
0 – 1.6
0.005
150 mm
0 – 2.5
0.01
250 mm
0 – 2.5
0.01
150 mm
0 – 4
0.02
250 mm
0 – 4
0.01
150 mm
0 – 6
0.02
250 mm
0 – 6
0.02
150 mm
0 – 10
0.05
250 mm
0 – 10
0.05
150 mm
0 – 16
0.1
250 mm
0 – 16
0.05
150 mm
0 – 25
0.1
250 mm
0 – 25
0.1
150 mm
0 – 40
0.2
250 mm
0 – 40
0.1
150 mm
0 – 60
0.2
250 mm
0 – 60
0.2
150 mm
0 – 100
0.5
250 mm
0 – 100
0.5
150 mm
0 – 160
1
250 mm
0 – 160
0.5
150 mm
0 – 250
1
250 mm
0 – 250
1
150 mm
0 – 400
2
250 mm
0 – 400
1
150 mm
0 – 600
2
250 mm
0 – 600
2
150 mm
0 – 760 Vacuum
5 (mmHg)
250 mm
0 – 760 Vacuum
2 (mmHg

Vacuum Gauge Dead Weight Tester

  /> </div>
<div class=

Model No. GT-55 For calibration of vacuum gauges and other sensing, transmitting and recording vacuum instruments. The Vacuum Gauge Tester is a quick and convenient method of calibration free from the disadvantages of using the fragile mercury Manometer. The main components of the tester are : 

SCREW PUMP to generate the vacuum in the tester conveniently and precisely of adequate capacity and operated by turning the spooked handle. 

FREE PISTON Assembly of special steel, hardened, tempered, ground and lapped to accurate size and very fine surface finish to provide true floating action. The free piston is suspended vertically downwards from a rigid frame and connected by a pipe to the screw pump. A CARRIER weight is attached to the free piston for taking more weights. 

A VALVE is provided to connect the circuit to the atmosphere and thus check zero of the gauge. 

GAUGE CONNECTOR of ½" BSP (F) union for connecting gauge to be tested. Other sizes of gauges can be connected by using adapters. 

SET OF WEIGHTS directly marked in convenient values of vacuum and easily stacked on the CARRIER weight. Available in either/and kgf/cm², mmHg, inHg units. Storage box is provided. 

BASEPLATE of sturdy construction having legs and leveling screws will be also provided. 

STANDARD RANGES 

Minimum Vacuum
Smallest Step
Maximum Vacuum
Unit
0.1
0.02
0.96
kgf/cm²
50
10
710
mmHg
2
0.5
28
inHg


Please specify the unit of calibration required. If this is not specified, the weights will be supplied in mmHg unit. Extra sets of weights in other units with same tester can be supplied on extra cost but must be ordered at same time.

Digital Flow Calibrator

  /> </div>
<div class=

The Digital Flow Calibrator combines the simplicity & versatility of a soap film bubble meter with the speed and accuracy of a microprocessor. With hands free operation, you can still see the bubble, but you also have precision of a digital display with accuracy of a quartz clock. No more tedious bubble formation, bubble watching, timing & flow-rate time calculation. The 

DFC-1 accurately calibrates air sampling pumps (vacuum or pressure), rotameters, orifices etc. quickly & reliably with accurate & reproducible results. 

FEATURES 


•  Primary Standard •  Multi Function Self Diagnostic for Error free Operation
•  Flow Accuracy ±2% •  Automatic Bubble-Feed for hands-free Operation
•  Wide Measuring Range •  Adjustable Glass Flow Cell for faster results at low flows
•  Tracks Multiple Bubbles •  Measures flow from pressure or Vacuum Source
•  Auto - Ranging •  Field Replaceable Glass-Flow Cell
•  Single or Average Mode •  Run or Hold Mode
•  Fully Portable •  Mains or Battery Operated
•  Auto Shut-off •  Optional Portable Printer for Permanent Records.


PRINCIPLE OF OPERATION : The DFC-1 gas flow calibrator operates on the principle of traditional soap film flow meter which has been automated with the use of high technology infrared sensors, quartz timing & microprocessor intelligence to provide instant digital read out of gas flow rates. A soap bubble is used to trace the gas flow through a fixed volume high precision glass flow-cell. When the liquid soap bubble passes through the first sensor, it activates a quartz timer, which stops when the soap bubble passes through the second sensor. The microprocessor then calculates the flow rate & instantly displays it on a liquid crystal display. 

SPECIFICATIONS : 

Measuring Range : 1.0 cc/min to 5.00 Ipm with Auto Ranging facility to cover full scale range of 199.9 ml/min., 1999 ml/min., & 5.00 Ipm. 

Display : 3½ digit Liquid Crystal Display with additional indication of LOW-BAT and various Self-Diagnostic System-Errors. 

Function : ON RESET - Key to reactivate the system after Auto-Shutoff (in 2 minutes when not in use) 

MULTI SINGLE - Modes to effect the measurement continuously for multiple bubble or to limit it to the first bubble. 

AVERAGE - Mode to average the last four readings. 

Accuracy : ± 2010 of Reading 

Flow Cell : Precision, Small-Volume Glass flow cell that is vertically adjustable to provide faster results for Low-Flow applications. It also accepts any type of soap solution. However for higher flow measurement, we recommend our standard solution. 

Automatic Bubble : This innovative bubble formation mechanism provides adjustable and continuous stream Formation of bubbles for hands free operation. A large reservoir of soap solution provides long uninterrupted operation without cumbersome process of re-filling after every few minutes. 

Power : 

• Mains Operated Model - 230 V AC 
• Battery Operated Model - 6 V Dry Cell or 
• ON indication on Front Panel. Rechargeable batteries Optional at extra charge. 

Dimensions : 20 (W) x 15 (D) x 23 (H) cms. 

Printer : Optional Impact type, Numeric or Alpha-numeric compact, Portable Printer for permanent record. 

Carrying Case : Optional corrosion resistant carrying case to accommodate, DFM-1, soap solution, printer & battery charger.
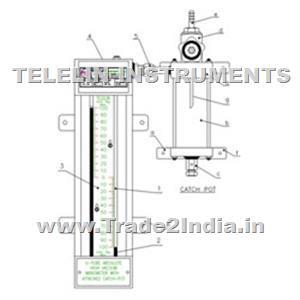
Digital Pressure Calibrator

  /> </div>
<div class=

Microprocessor Based Digital Pressure Meter/Calibrator, with excellent Accuracy & Repeatability in measurement of Pressure Using highly stable Temperature Compensated Pressure sensors with Microprocessor Technology and Software. This Precision Pressure Meter/Calibrator provides many operational features such as any Selectable Pressure Unit, Auto Zero function, Peak Hold Mode etc. All Meters/Calibrators are provided with calibration reports traceable to IDEMI. 

FEATURES :

•  Selectable Engg. Unit From 11 common Pressure Unit mm/inches of WC/Hg, Kg/cm2, Psi, mbar, Bar, Kpa.

•  Automatic Zero Adjustment & Self Test

•  Selected Unit Remains in Memory

•  Peak Hold Mode with a Key

•  Highly Accurate ± 0.1 % of FS.

•  Overload Indication (i.e. Range Exceedancy)

•  32 Character Alphanumeric LCD (with Backlight Option).

•  Digital Averaging.

•  Re-calibration & Linearization by Keys.

•  High Resolution with 4½ Digits

•  Hand Held or Table Top Model

•  Display


SPECIFICATIONS : 
 

Display

:

16 Character X 2 Line LCD Module (Back Lit Option Through Adaptor)

Keys

:

3 Nos. (Units, Auto zero & Peak Hold)

Resolution

:

4 ½ Digit ( i. e. 19999 Counts)

Pressure

:

Selectable from any of 111 pressure

Unit

:

Units with Units Key

Overload Indication

:

At 20 % of full Scale, Audio-Visual Indication

Sensor Range

:

Any Sensor from 0.3 PSI to 5000 PSI

Power

:

6V (1.5 Vx4 Pencil Cells) or through Mains Adaptor (Optional)

Dimension

:

220 x 150 x 60 mm for Table Top Model 220 x 100 x 40 mm for Hand Held Model.

Accuracy

:

Better than ± 0.1 % of ES

Instrument Line Fittings And Pipe Fittings

  /> </div>
<div class=

Telelin make Instrument Pipe fittings are manufactured from bar stock material or quality forged material using 304 S.S / 316 S.S / Brass / M.S. in NPT / BSP Threading. 

Types of connectors: 

•  Male Branch Tee
•  Female Run Tee
•  Male Run Tee
•  Union Cross
•  Positionable Male Run Tee
•  Union Tee
•  AN Union
•  Union
•  Bulkhead Union
•  Bulkhead Female Connector
•  Barrel Nipple
•  Reducing Union Tees
•  Knurled Nut
•  Female Elbow
•  Union Elbow
•  Male Elbow
•  45” Male Elbow
•  Bulkhead Male Connector
•  Male Connector
•  Bulkhead Reducing Union
•  Female Connector
•  Hose Nipple

Flanges

  /> </div>
<div class=

Telelin make Flanges are available in Carbon Steel, Stainless Steel, Mild Steel and Alloy. Whether it be Blind, Threaded, Weldneck, Socketweld, Slipon, Lapjoint or orifice, We have sizes ranging from ½” to 48”. Classes like ASA 150 to 2500, BS Table E to K, DIN from ND6 to ND64 and Grades like A105, A304L, A181, A350-LF2, A181-F1, F5, F9, F11, F22 etc.


Hoses

  /> </div>
<div class=

Telelin make Industrial Hoses are designed taking into account clients pressure, Temperature & connection orientation. Hoses are available in rubber, stainless steel, stainless steel bellow type, rubber braided types. All Fittings & Flanges are supplied welded to braided or unbraided hose. Secure further information by sending us your individual requirement. This Hose assemblies are used in chemical plants, paper plants, tire moulds, Air-conditioning plants, Textile Machinery, Steam conveying, lines, Gas-filling, Power Houses, Oil Refineries etc. etc. 

Sizes Available from ¼” to 8” and lengths upto 8 mtrs. 

Temperature from 196 o C to 600 o C

Valves And Manifold Valves

  /> </div>
<div class=

Telelin make Valves and manifold valves are manufactured from barstock & forged 304/316 S.S. Material with mounting Flange or without. 

Types of Manifold Valves : 

•  Two Way Manifold 
•  Three Way Manifold 
•  Five Way Manifold 
•  Or as per your requirement 

Telelin also specializes in manufacturing quality ball valves in 304 S.S./316 S.S and C.S. Material in line size ¼” To 4” Types of Valves : 
 

•  Single Piece designed Ball Valves
•  Three Piece designed Ball Valves
•  Investment Casting / Cast Iron Ball Valves
•  Gate Valves
•  Non –Return Valves
•  Two Piece designed Ball Valves
•  Three way Ball Valves
•  Gauge Glass Cork
•  Globe Valves
•  Wafer Check Valve

Venturi Tubes

  /> </div>
<div class=

Venturi Tubes are used widely for measurement of Differential Pressure(DP) in industries were accurate DP is required.

•  Venturi Tubes are designed as per BS142 on the basis of customers given fluid, flow. Temperature pressure details. 

•  Venturi tube has two pressure tappings of ½” BSP (f). 

•  M.O.C. as per fluid requirement 

•  Indicating instrument optional

Thermometer And Hygrometer

  /> </div>
<div class=

Different Types of Thermometers & Viscosity Meters   

  • Standard Joint Thermometer.
  • Straight Inclusion Thermometer.
  • Chemical Thermometer with metal casing.
  • A.S.T. M./ I.P. Thermometer.
  • Oven Thermometer
  • Angle / Straight type Thermometer with metal casing.
  • Taylor / Sika Type Thermometer
  • Pocket Thermometer
  • Viscosity Meters
  • Hygrometers i.e Wet & Dryable Thermometers for humidity measurement

Mc Leod Gauge

  /> </div>
<div class=

Telelin” make Mc-leod gauges measures absolute vacuum in its very last stages. 

Model No : MG-6 Portable Mc-leod gauge, with stand & 1 st fill Mercury. 

The vacustate suitable for measurement of vacuum in the range : 10 mm. to 10-3mm of Hg. (i.e. 10 mm. to 0.001 torr) with stand & 1 st Mercury. This gauge avoids use of a movable reservoir of mercury and also requires only about 14 cc. of mercury for first filling. The total size of this gauge is about 9” x 6”. Metallic stand with Rotating arrangement & 1 st fill mercury is provided. 

WORKING OF THE GAUGES : 

The system of which vacuum is to be measured, is connected by flexible rubber tubing to nozzle on the back centre of gauge at A. Gauge is in Horizontal position-1 initially. To take vacuum reading, gauge is to be rotated in the vertical position-2. Mercury runs out of the container B, compressing the residual air or gas. contained within region C & D, to short length of capillary tube C & E. By arranging that the level in the comparison capillary F is opposite the end of the graduated capillary C & E, slight adjustment of gauge above the vertical axis is needed to adjust the mercury level correctly. the Reading in tube C-E is absolute Vacuum in mm of Hg in your line. 

Gauge is portable & so one gauge can be used to counter check absolute vacuum at different places. Very help full to know that permanently mounted Dial Type Pressure gauge or U-Tube high vacuum manometer or any other gauge is giving correct reading or needs maintenance & re-calibration. scale is expanded from 1.0 to .001 toor and so minute reading in very last stages becomes passable. 

Other vacuum measuring manometer available with us are : a) U-Tube Absolute High vacuum manometer with Attached Catchpot, measure vacuum in last stages from 660 mm to 760 mm Hg., in stapes of 1mm Hg. b) Full range vacuum manometer, one end open to atmosphere range 0 to 760 mm Hg. c) Condenser Vacuum gauge with Attached Catchpot. Lighting arrangement is optional.

Barometer

  /> </div>
<div class=
MODEL NO. : FBA-101
BODY :
Having all brass pipe graduated with vernier operating with rack and pinion.
SCALE :
Graduated from 68 cm. to 81 cm. with 1 mm divisions. Readability with vernier upto 0.1 mm
MERCURY TUBE :
Standard size 90 cm. LONG CORNING GLASS TUBE of 6 mm. bore & thick wall, filled with TRIPPLIED DISTILLED MERCURY. (at site)
MOUNTING BASE : Barometer, fitted on a polished wooden base.
ACCESSORIES :
1 kg triple distilled mercury, a plastic funnel, filter cloth for mercury cleaning will be provided.
THERMOMETER (Optional) : A glass thermometer, Range (-) 5°c to (+) 50°c can be attached at extra cost
GLASS CASE (Optional) :
Specially designed, polished seasoned wood case with 3 side Glass Panels & provided with a locking hook & 2nos. mounting hooks, can be provided for dust free mounting of Barometer
SPARES (Optional) :
Mercury Tube, Leather Cap, Spare Mercury, any other parts can be supplied at extra cost.
INSTRUCTIONS :
Unpacking, Mercury filling & installation instructions will be provided with supply
GAURANTEE :
Our Fortins Barometers are guaranteed against any manufacturing defects.
CHECKING :
READING Atmospheric pressure reading to be obtained from nearest Weather Bureau over phone & compared with our Barometer reading. If more than 5 mm difference is observe than mercury filling after mercury cleaning is required to be done again.


Differential Pressure Gauge

  /> </div>
<div class=
Specifications 
 
Accuracy : ± 2% ofthe FSD (Ascending)
Migration : Minor from high to low port
Range : 0-0.25 to 0-70 bar or equivalent range in other units
First marking on the scale : 20% of the FSD
Sensing element : Piston
Wetted parts : Body material, SS 302 spring, Teflon, & ceramic magnet
Case material : Stainless steel (SS 304)
Dial size in inch /mm : 2",2.5",3.5",4",4.5", 6"/50, 63, ao, 100, 115, 150
Mounting : Direct, front flange & 2" pipe mounting
Maximum working pressure : 200/400 bar. 200 bar for Alu, Brass & 400 bar for SS body
Maximum process temperature : 8o°c /175° F
Body material : Aluminum, Brass, SS 316 & Monel
Seals : Buna-N, Viton & EPDM '0' rings
Window : Float glass(Std.), toughened glass & acrylic on request.
Connection : 1/4" NPT(F) Std. optional 1/4" BSP(F)
Porting : In-line, rear, bottom
Over range protection : Up to the max. working pressure from high & low side
Protection for gauge & switch : IP 65/ NEMA-4

Switches (Adjustable in 20·100% of FSD) 

•  1 or 2 SPSTs with a DIN plug 
•  1 or 2 SPSTs with a terminal strip 
•  1 or 2 SPSTs with a built in relay 
•  1 or 2 SPDTs with a terminal strip 
•  1 or 2 SPDTs with a DIN plug 

Options

•  Glycerine filling 
•  Red follower pointer (except 2" & 6") 
•  Customer logo •  Dual scale 
•  Colour band •  Filter mesh in (+) connection 
•  Reverse port (Pointer moves from right to lett.) 
•  Descending calibration

Oil Flow Meter

  /> </div>
<div class=

For Accurate metering of LIGHT, MEDIUM & HEAVY OILS, ORGANIC LIQUIDS & SOLVENTS 

This meter falls under the category of Positive Displacement Meters. The Steam of liquid is momentarily interrupted in order to isolate a predetermined volume. This quantity is then discharged and the stream is again interrupted to isolate another similar volume. 

The measuring unit of this meter utilizes the mutating piston movement. This movement is similar to the action of a coin which has just been spun and is coming to rest. This design feature maintains the metering accuracy over a wide range of flows and is hardly influenced by variations in viscosity and temperature. 

Low headloss is in practice achieved by eliminating reciprocal parts and by allowing sufficient clearance between the piston and the measuring chamber to eliminate friction. In effect the minute clearance between the edge of the piston and the measuring chamber is effectively sealed by a film of liquid. 

For line size : ½” to 6” 

IMPORTANT FEATURES : 

•  High accuracy and repeatability with low pressure drop. 
•  Materials of construction changeable to suit the measured liquid. 
•  Large metering range for varying viscosity. 
•  Easy dismantling and cleaning without removing the meter from the pipe.   

ACCURACY : 

•  Standard Meters : +/- 2% 
•  Special Meters : +/- 0.5% 
•  Constant viscosity & restricted flow rates can give even better accuracy.

Our Vision

* To embrace new technologies and methods. * To give unsurpassed products and services to the clients. * To constantly look for improvement and changes.

Site Designed & Maintained by Aman Infotech
Absolute Vaccum Manometer, Absolute Vacuum Manometer, Acrylic Body Inclined Tube Manometer, Acrylic Body Level Indicator (Moving Bolt Type), Acrylic Body Single Limb Manometer, Acrylic Body U Tube Manometer, Acrylic Plastic Body Rotameters, Air Purge Level Indicators, Air Purge Rotameters, Air Velocity Measuring Kit, Barometer, By Pass Rota Meters, By Pass Type Rotameter, By Pass Type Rotameter Complete Assemblies, Comparison Test Pump, Dead Weight Pressure Gauge Tester, Differential Pressure Gauge, Digital Flow Calibrator, Digital Magnetic Rotameter, Digital Pressure Calibrator, Digital Pressure Manometer, Double Window Sight Flow Indicators, Electromagnetic Flowmeters, Electronic Level Gauges, Flange Tape Type Rota Meters, Flanges, Float And Board Level Indicators, Flow Measuring Instruments, Full View Sight Flow Indicators, Gang Manometer, Gang Rotameter, Glass Tube Level Indicator (Moving Bolt Type), Glass Tube Rota Meters, Glass Tube Type Purge Rotameter, Glass Tube Type Rotameter, Hoses, Inclined Tube Manometer, Inlined Tube Meno Meters, Instrument Line Fittings And Pipe Fittings, Level Switches, Low Flow Acrylic Plastic Body Rotameters, Low Flow Glass Tube Rotameters, Magnetic Bi Colour Level Indicators, Magnetic Level Indicator, Mano Meters, Master Pressure Gauges, Mc Leod Gauge, Mercury Barometer, Metal Tube Rota Meters, Metal Tube Rotameter, Metal Tube Rotameter With Switching Alarm, Oil Flow Meter, Orifice Assemblies, Orifice Plates, Pressure Measuring Instruments, Principles Of Rotameter And Flowmeter, Products, Reflex Level Indicator, Rota Meters, Single Limb Absolute Pressure Mercury Filled Manometer, Single Limb Mano Meters, Single Limb Well Type Manometer, Thermometer And Hygrometer, Top Mounted Magnetic Level Indicators Bi Colour Roller Type, Transparent Level Indicator, Tubular Level Indicator, U Tube Absolute Pressure Mercury Filled Manometer, U Tube Manometer, U Tube Meno Meters, Ultrasonic Flowmeters, Vacuum Gauge Dead Weight Tester, Valves And Manifold Valves, Venturi Tubes