ORBITAL SYSTEMS BOMBAY P.LTD
Featured Products
Highest quality standards are achieved through the implementations of latest technology, decades of experience and everlasting moral values , which have helped us to retain our customers as well as multiply them.
Welcome to ORBITAL SYSTEMS BOMBAY P.LTD
Robotic Laser Measurement Systems For Automobile Industries
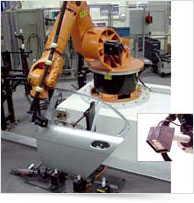
FMS for Gap & Flush
Measurement
Sampling with CMM’s does not insure that all parts meet specifications. Measuring one or two assemblies per day does not find random errors in assembly and does not provide trend analysis for process monitoring.
Measurement of Gap & Flush in-line usually is done with hand-held probes, subject to operator error and with high labor cost.
In-line measurement is made more complex when flexible assembly lines produce multiple significantly different models, making fixed laser sensor measurement impractical.
Our Vision
* To embrace new technologies and methods. * To give unsurpassed products and services to the clients. * To constantly look for improvement and changes.


